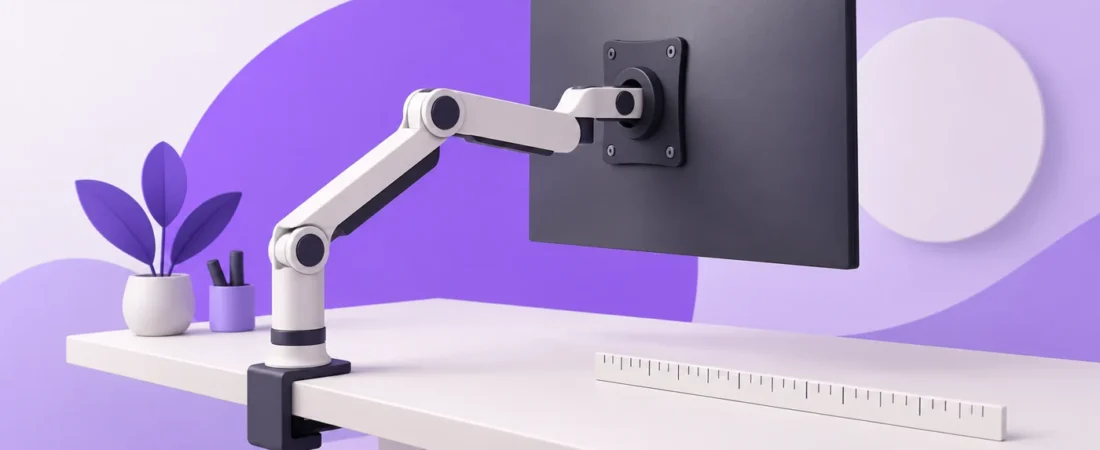
Image: Conceptual buying-guide illustration, not a photograph of the specific products discussed.
For a shallow desk against a wall, start with the screen position you need and work backward to the mount. A short bracket on a pole is worth checking first if the screen will mostly stay put. An articulating arm makes more sense when you regularly move it, provided its folded shape fits beside or behind the monitor at your working height.
A big extension number tells you how far an arm can reach toward you. That may be the exact talent your 24-inch desk does not need. The useful question is where the screen ends up when the arm is tucked away and the wall refuses to negotiate.
This guide compares three different arrangements: the direct-to-pole VIVO STAND-V001C, the jointed VIVO STAND-V001, and the counterbalanced Ergotron LX Pro 45-682-292. None is a universal fit. The measuring process below will help you rule out the wrong one before a heavy metal puzzle arrives.
Affiliate disclosure: As an Amazon Associate I earn from qualifying purchases. Amazon links below are affiliate links. Check the selected model, seller, delivery details, and return terms before ordering.
Research checked October 15, 2026. This is a research-based buying guide using manufacturer specifications, assembly instructions, dimensional drawings, and Amazon catalog identity checks. We have not hands-on tested these mounts. Prices and availability are not quoted.
First separate four measurements that often get mixed together
1. The screen position you actually want
Place your current screen where you want to use it, if its stand allows. Sit normally with your keyboard and mouse in their real positions. Check the text size, your room layout, and whether the display feels too close for the work you do. Record the position rather than choosing a universal viewing-distance number.
Measure from the wall to the front of the screen, at its center. Then measure from the desk’s front edge back to that same screen plane. These tell you whether a new mount will genuinely put the image farther away. Removing a bulky stand can clear space underneath the display while leaving the image just as close.
2. The folded arm’s shape
Look at a top-view drawing, with the arm arranged at the height and sideways position you plan to use. A folded elbow can project behind the desk. Folding the links sideways may move that bulk over the desktop, but it needs lateral room and a clamp location that still lets the screen sit in front of you.
Also check a side view. A counterbalanced arm changes its geometry as it rises and falls. A position that clears the wall with the screen high may not clear it at your everyday height. A single attractive product photograph cannot establish the whole movement range.
3. Installation and under-desk clearance
The clamp has to reach the desktop, seat properly, and leave access for its screw or tool. A rear apron, drawer, metal frame, cable tray, or beveled underside can interfere even when the desktop’s thickness is within the advertised range.
Installation space is a separate issue from working space. Ergotron’s desk-attachment guide illustrates how some two-piece clamps can be assembled around an edge, while other designs slide on from the back or side. That helps explain the distinction; use the manual for the exact arm and clamp you are buying.
4. Monitor and cable clearance
The VESA mounting plate sits behind the screen. The display casing, a recessed mounting area, approved spacers, connector housings, and cable bends all take space too. An arm’s folded depth is therefore not the same thing as the distance from wall to screen face.
Check the actual rear connections with the cables plugged in. A rear-facing power connector may become the limiting object before the arm touches anything. Keep the monitor’s ventilation clear according to its own manual, and do not bend a cable sharply just to win a fraction of an inch.
A measurement worksheet for a 24-inch desk
You need a tape measure, the monitor’s model number, and access to the underside of the desk. Take the measurements in one unit. Millimeters are convenient for VESA holes and tight clearances; inches are fine if you keep the calculations consistent.
- Desktop depth: Measure front to back at your seating position. Record any curved front edge or rear cutout.
- Wall gap: Measure the available gap behind the desktop. Check the height where the arm will move, including shelves, window trim, outlets, and wall-mounted objects.
- Target screen position: Record wall-to-screen-face distance, center height above the desk, and the horizontal center you want.
- Mounting surface: Record the desk model, construction, actual thickness at the proposed clamp position, and the flat contact areas above and below.
- Under-desk obstacles: Measure inward from the rear edge to the nearest obstruction, plus vertical room for the clamp and adjustment tool.
- Sideways space: Mark where a folded arm could lie without hitting a second display, speaker, lamp, shelf support, or neighboring workstation.
- Display fit: Record stand-removed weight, VESA pattern, casing depth, mounting recess, and any accessories carried by the mount.
- Cables: Measure connector projection and the route to your computer or dock. Include the desk’s full travel if it raises and lowers.
Here is a made-up example, not a measurement of any product in this article. A desk is 24 inches deep and sits 1 inch from the wall. Its front edge is therefore 25 inches from the wall. If the screen face sits 9 inches from the wall, it is 16 inches behind the desk’s front edge: 24 + 1 – 9 = 16.
Moving that screen face to 5 inches from the wall puts it 20 inches behind the front edge. You have gained 4 inches of setback. That calculation does not give your eye-to-screen distance, because your eyes are not attached to the desk edge. It simply lets you compare two layouts honestly.
Before ordering, sketch the top view with the wall, desktop, clamp, arm links, and screen outline. Use manufacturer dimensions rather than scaling a lifestyle photograph. For a curved monitor, include the nearest forward-projecting part of the screen, not just its center. If a critical folded dimension is missing, ask the manufacturer for it.
The quick decision tree
- Does the factory stand already put the screen where you need it? Keep it unless the space underneath is valuable enough to justify a mount. An arm is optional equipment.
- Can the desk support the proposed attachment? If the desk maker prohibits clamp mounting, or the surface construction is unknown, stop. Resolve that before selecting an arm.
- Will the screen mostly stay at one height and depth? Start with a short direct-to-pole mount such as the VIVO STAND-V001C. Confirm its fixed front-to-back position.
- Do you need sideways movement but rarely change height? Consider a jointed pole mount such as the VIVO STAND-V001, with enough space to park its links.
- Do you frequently change screen height or pull it forward? Consider a counterbalanced arm such as the LX Pro, after checking its minimum load and the whole movement envelope.
- Does every workable arm position push the screen too close? Reconsider the desk location, an approved side-clamp position, or a properly installed wall mount. Do not buy a longer arm simply because the shorter one failed the sketch.
Three mounts to check against your measurements
VIVO STAND-V001C for a screen that stays near one position
The STAND-V001C attaches the display through a short bracket to a vertical pole, without the long folding links of the other options here. That makes it the most straightforward shape to investigate when rear elbow clearance is the main problem. Its short bracket still creates an offset, so it is not a flush mount.
VIVO specifies a 17.6-pound maximum, 75 × 75 mm or 100 × 100 mm VESA mounting, and a 17.7-inch pole. Its current product page lists desktop thickness of 0.4–3.25 inches for the clamp and 0.4–3 inches for the grommet arrangement. Pole height is not a promise that your screen center can use every point on that pole.
A detail to resolve near the limit: The linked assembly manual shows 10–88 mm for the clamp and 10–75 mm for the grommet. Those maximums do not exactly match the page. Plan around the narrower limit from the two sources, including 75 mm for the grommet, and get model-specific confirmation if your desktop is close to a boundary.
Skip it if you want easy daily height changes or need to pull the screen forward and push it back. Also pause if your purchase depends on an exact minimum wall-to-screen distance: the text specifications do not establish that measurement for your monitor.
Check the VIVO STAND-V001C on Amazon. Match the full model suffix; STAND-V001 is a different design.
VIVO STAND-V001 for horizontal adjustment at a mostly fixed height
This model adds jointed horizontal links to a pole. It can be worth investigating when the clamp needs to sit off-center and the screen must reach back to the middle of the desk. The extra joints also give you more shapes to fit around the wall, and more shapes that can hit it.
The manufacturer page lists a 22-pound limit, VESA 75 × 75 mm and 100 × 100 mm, a 17-inch pole, and up to 16 inches of extension. It lists a 3.25-inch maximum desktop thickness. The current manual shows a 10–85 mm clamp range, another small page/manual discrepancy. Stay within both sets of limits or confirm with VIVO.
Height is secured along the pole with a tool. This suits occasional adjustment better than repeated up-and-down movement. VIVO explains that distinction in its mount FAQ.
Skip it if you cannot establish where its links will fold at the intended screen position. A 16-inch maximum reach does not answer minimum depth. Follow the manual’s requirement to keep the monitor positioned over the desktop; rotating it behind or beyond the desk is not an acceptable space-saving workaround for this model.
Check the VIVO STAND-V001 on Amazon.
Ergotron LX Pro 45-682-292 for frequent repositioning
The matte-black LX Pro is the option here to investigate when easy height changes are part of the job. Ergotron specifies a 4–22-pound load range, 13 inches of lift, and 75 × 75 mm or 100 × 100 mm VESA patterns. Its two-piece clamp model fits a published 0.4–2.4-inch desktop-thickness range. See the LX Pro specifications and mounting configurations.
The exact 45-682-292 package uses a desk clamp. Do not assume the grommet hardware from another LX-family package is included. Ergotron sells separate configurations and accessories. The manufacturer’s exact-model listing also cautions that a display deeper than 3.6 inches can affect capacity. A heavy curved monitor therefore needs a more careful check than matching its diagonal size.
The drawing is useful, but read its arrows: Page two of the LX Pro dimensional drawing, revision August 10, 2026, labels a 5.0-inch depth and a 12.6-inch lateral span in its folded top-view illustration. Follow the endpoints of those dimension arrows; they describe that particular hardware arrangement. They are not a universal five-inch gap required between your desk and wall, and they do not include your screen’s thickness.
Ergotron also provides a rotation stop that can limit movement at the base. It helps control where the arm swings, but you still have to map the elbow, display, and cable paths. A stop cannot create space that is missing.
Skip it if the mounted load falls below 4 pounds or exceeds 22 pounds, the desk is unsuitable, or the intended folded position fails your measurements. If you only need one fixed screen position, its movement may be more capability than you need.
Check the matte-black Ergotron LX Pro 45-682-292 on Amazon. The older LX 45-241-224 is a different product; do not transfer its specifications or included hardware to the Pro.
Check the monitor with its stand removed
Look for the monitor manufacturer’s panel-only or stand-removed weight. Shipping weight includes packaging, and the normal assembled weight includes a stand you will not hang on the arm.
For a concrete example, Dell lists its P2425H panel at 6.88 pounds for VESA mounting, while packaged weight is 14.95 pounds. Those numbers answer different questions. The panel weight is the starting point for mount selection, not a blanket compatibility approval.
Add the weight of anything the arm will carry, such as an approved adapter or attached accessory, and check how the manufacturer wants that load assessed. The desk must also support the mount itself. Do not round a borderline load down, assume every curved panel behaves like a flat one, or use a stronger-sounding product name as a substitute for the rating.
A counterbalance has a minimum load as well as a maximum. An unusually light display can be a poor match even when the box says it supports a much larger screen. A fixed pole arrangement may be worth investigating instead, but verify the exact product rather than assuming all pole mounts have identical limits.
Measure VESA holes center to center, horizontally and vertically. Matching 100 × 100 mm is only the first check. The plate must fit the recess, the screws must have the right thread and permitted engagement depth, and spacers must follow the display and mount instructions. If the monitor lacks VESA mounting, investigate an explicitly compatible adapter and its added load before ordering anything.
Desk thickness does not tell you whether the desk can take the load
A clamp opening is a geometry specification. It does not certify your desk. Ergotron’s LX Pro assembly guide requires a mounting surface strong enough to support the product and attached equipment.
Identify the construction at the actual attachment point. Solid wood, engineered board, a hollow-core panel, a glass top, and a decorative edge need different consideration. A thick-looking rim may not tell you what is inside or where a clamp is allowed. Ask the desk manufacturer about this mounting method and location, not just the total weight the desktop can carry.
Do not buy a clamp mount yet if the desktop is damaged, the underside cannot provide the required contact, or you cannot establish compatibility for glass, hollow-core, or other uncertain construction. A reinforcement plate may be part of an approved installation, but buying one does not establish that the underlying desk is suitable.
A grommet mount needs suitable material, the specified hole size and location, and proper underside contact too. An existing cable hole is not automatically a structural mounting point. Do not drill a rented, borrowed, glass, or otherwise uncertain desktop on the strength of a general shopping guide.
Cables can quietly undo a good layout
Route the display’s power, video, and USB cables before deciding the setup is finished. Leave the slack required for the movements you will use, following the arm manual. Check low and high positions, forward reach, sideways movement, and portrait rotation if supported.
The LX Pro guide specifically calls for sufficient slack and correct routing to prevent pinching. In your own layout, watch the connectors as well as the middle of each cable. A cable that looks loose near the computer can still pull tightly at the monitor when the elbow folds.
On a sit-stand desk, check the route between the moving desktop and anything that stays on the floor or wall. Keep cables away from pinch points. A right-angle adapter is only useful if its orientation, electrical capability, and physical fit are right for that port; it is not a universal clearance fix.
Do not force the arm through resistance or keep tightening a screw to compensate for an incompatible load. Follow the model’s adjustment instructions. Counterbalanced mechanisms also need care when removing a screen: the LX Pro manual warns to move the arm to its highest position first because the unloaded mechanism can rise quickly.
Questions worth answering before you click buy
Can a monitor arm work on a 24-inch-deep desk?
Yes, in a compatible layout. Desk depth alone cannot establish fit. The answer depends on your desired screen position, mounting location, arm shape, wall clearance, desktop construction, and monitor. Use the worksheet rather than buying from a list headed “for small desks.”
Does a top-mounted clamp solve the wall problem?
It can make fastening easier when under-desk access is awkward. It does not automatically remove the clamp’s physical space requirements or the arm’s rear sweep. Check the exact clamp’s installation path and finished dimensions separately.
Can I put the clamp to one side?
Potentially, if the desk and mount instructions permit that position and the arm reaches your target screen location. Recheck contact area, sideways clearance, cable length, and the monitor’s permitted position over the desk. Moving the clamp changes the whole layout.
Would a wall mount be better?
It may solve a desk-attachment problem, but it introduces wall construction, anchoring, placement permission, and a different folded-depth problem. Its screen height also stays tied to the wall while a sit-stand desk moves. Treat it as a separate installation decision.
The final buying check
- I know where the screen face and center need to end up.
- The desk maker’s guidance supports the attachment method and location.
- The clamp or grommet fits, including access and underside contact.
- The arm clears the wall throughout my intended adjustments.
- The stand-removed display load, accessories, and VESA interface fit the exact mount.
- The cables and monitor ventilation still have the space they need.
- I checked the exact model number, included mounting hardware, and current seller terms.
If the screen stays put, investigate the STAND-V001C’s short-bracket layout first. If you need occasional horizontal repositioning, sketch the STAND-V001. If frequent height and depth changes matter, check the LX Pro’s drawing and load range. If any critical measurement remains unknown, get that answer before ordering. A tape measure is considerably easier to return to the drawer.